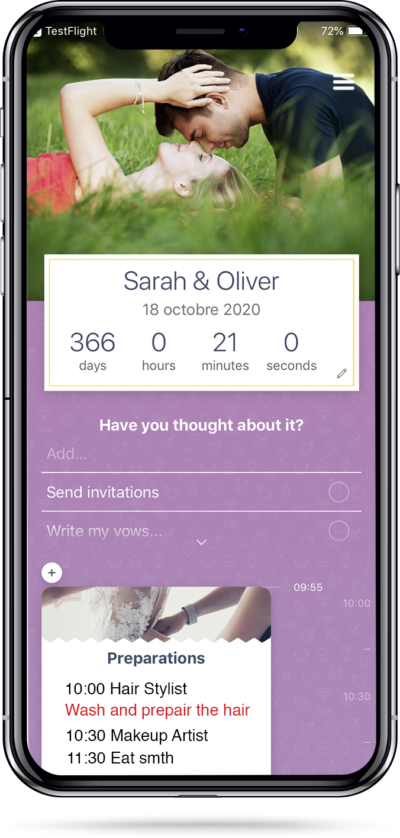
Your Personnal Assistant for your Wedding
Wedding Planner Pro helps you create and organise the whole wedding day in a few minutes.
The app is completely customizable, you have the full control over the timeline and the infos so you can adapt it to your plan and share it with your guests and friends that are helping you in the process.
Usually we don’t know what we want for our day, but we know exactily what we dont want.
Thanks to our experience over 150 weddings, we created a full wedding day with all the tips, tricks and lists so at the end you are able to chose only the important parts that matter to you.

Tutorials and FAQ
In order to change the personal infos, just click on the pen next to the count down, you can then change names, the date and the picture. See the video below:
See the videos 1 and 2 below or read the following.
- You have to activate the modification mode first by a long click on a moment.
- Then you have to drag and drop the top or the bottom part of the moment.
If you drag and drop the beginning (top part) of a moment it changes the starting point, if you drag and drop the ending time (bottom part), it changes the duration.
To activate the timeline modification of a moment, make a long click on the top 0r the bottom part.
To adjust the starting point and the duration of a moment, you have to enter the modification mode by making a long click on the top or bottom art of a moment. Then you have to drag and drop the top part (It changes the starting point) or drag and drop the bottom part which modifies the duration of a moment.
In order to separate two different moments you have to activate the timeline modification mode on the lower moment (long click on the moment) and move down the starting point.
The infos in a moment or also called « my notes » that are visible in the main screen is a text modulus. You can personalize it by clicking on it or on the icon representing a text note. You can then, choose the color you want to write with and simply click on the text to modify or add. You can use it to make a detailed description of the events in the moment including the schedule.
A moment checklist is a personal list of thing to do for the specific moment (like : pick the song for the boys walk in the « ceremony moment »). In order to customize it, click on the icon representing a checklist, then click on the element you want to change or on the first line « add… » and star typing a new element.
In order to keep track of what is done and what is left simply click on the circle on the right to check it or leave it blank.
If you want to erase an element that you don’t need, simply swipe it to the left.
If you want to erase an element from a checklist that you don’t need, simply swipe it to the left.
If you want to see or hide the whole checklist on the main screen, also called « Have you thought about it? » simply click on the Title « Have you thought about it » or on the arrow below the list.
In order to open the general view or see the whole wedding day on the screen scroll to the bottom of the main screen and click the « See all »button.
First scroll to the bottom of the main screen and click the « See all » button, then press on the moment you want to move and drag it to the desired position.
Scroll down to the bottom and click on the « share » button. You will receive a link where all the infos are available at once (Timeline, notes and infos, checklists etc.)
With this link all the loved ones can access and print it. An internet connection is required.

